


This blog post provides a complete walkthrough of the process of building a RESTful API for Potions Bank using Spring Boot and MongoDB. We’ll cover the steps involved in setting up the development environment, creating necessary components, and integrating them to create a robust and scalable API. By the end of this tutorial, you will have a solid understanding of how to leverage Spring Boot and MongoDB to build powerful APIs for storing and managing magical potions. For this, using IntelliJ Idea is recommended but you’re free to use any IDE of your convenience that supports Java programs to execute.
Pre-Requisites -
Understanding REST APIs!!
What is Spring Boot?
What is MongoDB?
With the required fundamentals in place, we’re good to go!!
Creating & configuring the Spring Boot application:
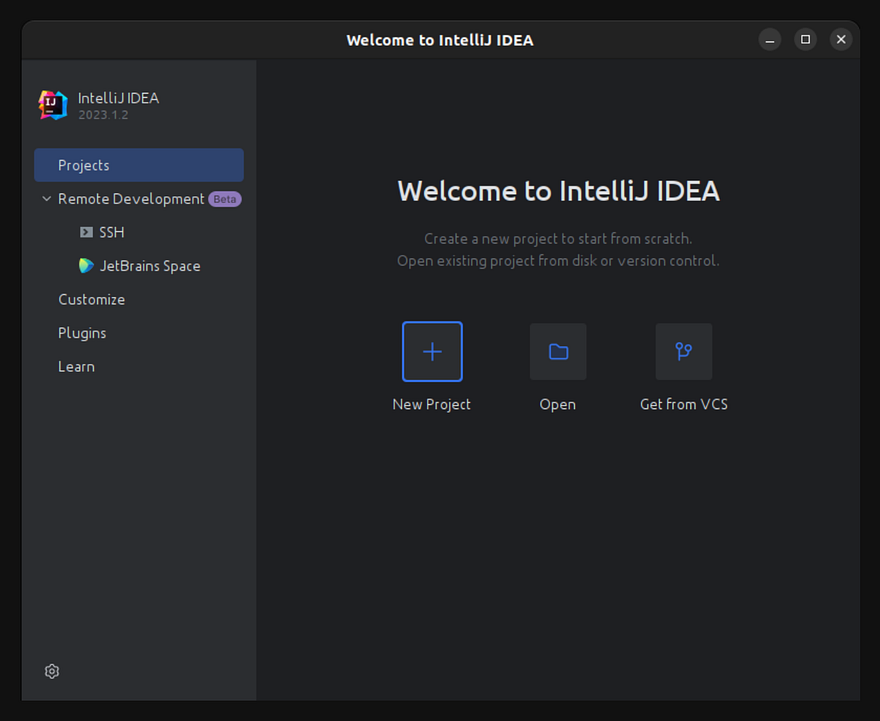
Create a new project and select the Spring Initializr in the left pane.
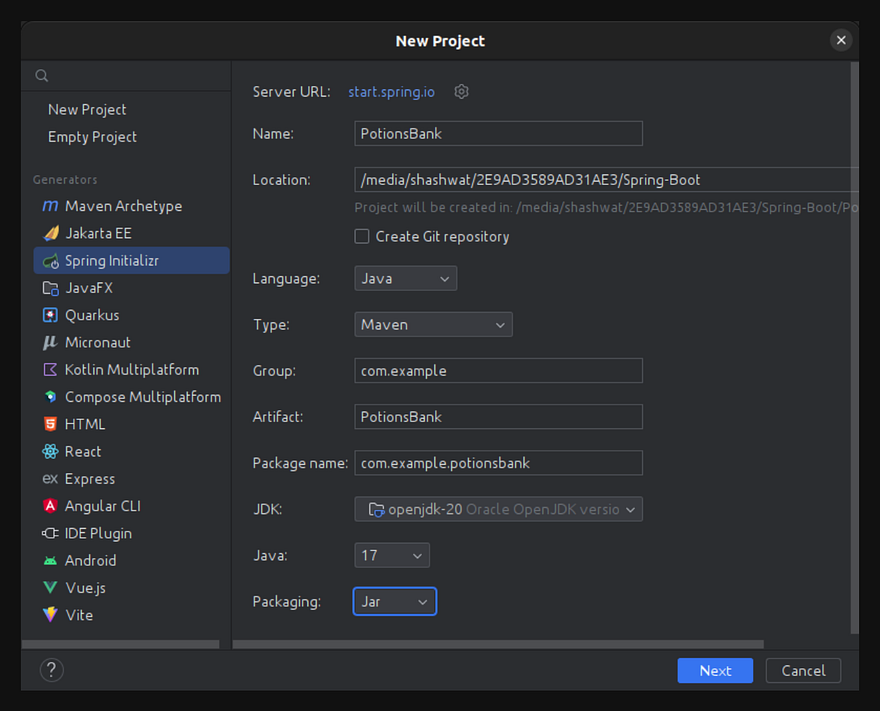
Choose a suitable project location for your convenience. And make sure that the details in Language, Type, JDK, Java, and Packaging field are the same as shown above.
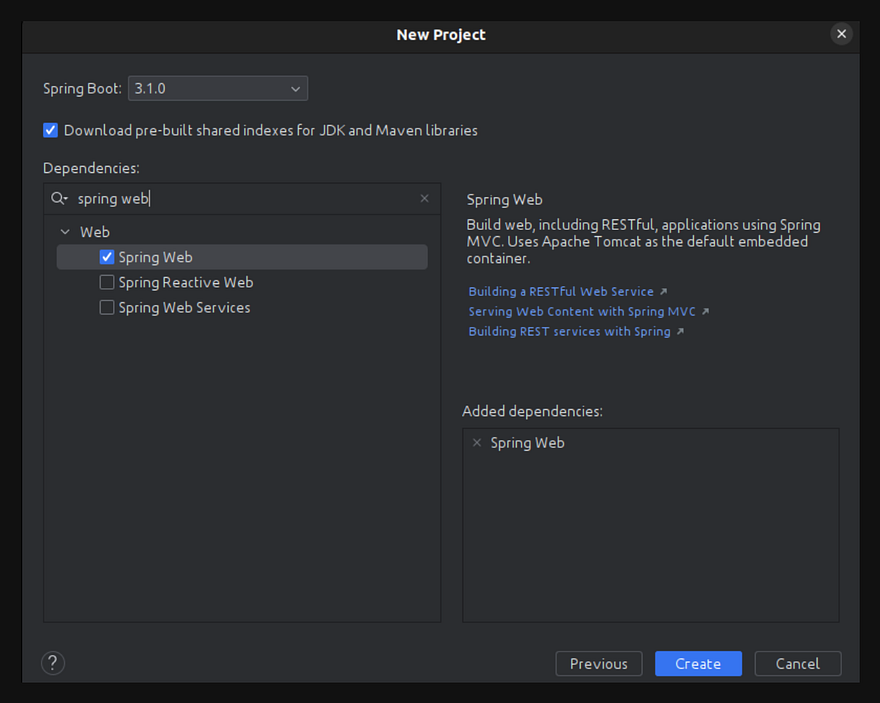
Choose any version of Spring Boot except the (Snapshot) version of it. In the dependency search bar, search the dependencies Spring Web and Spring Data MongoDB, select these, and click on Create.
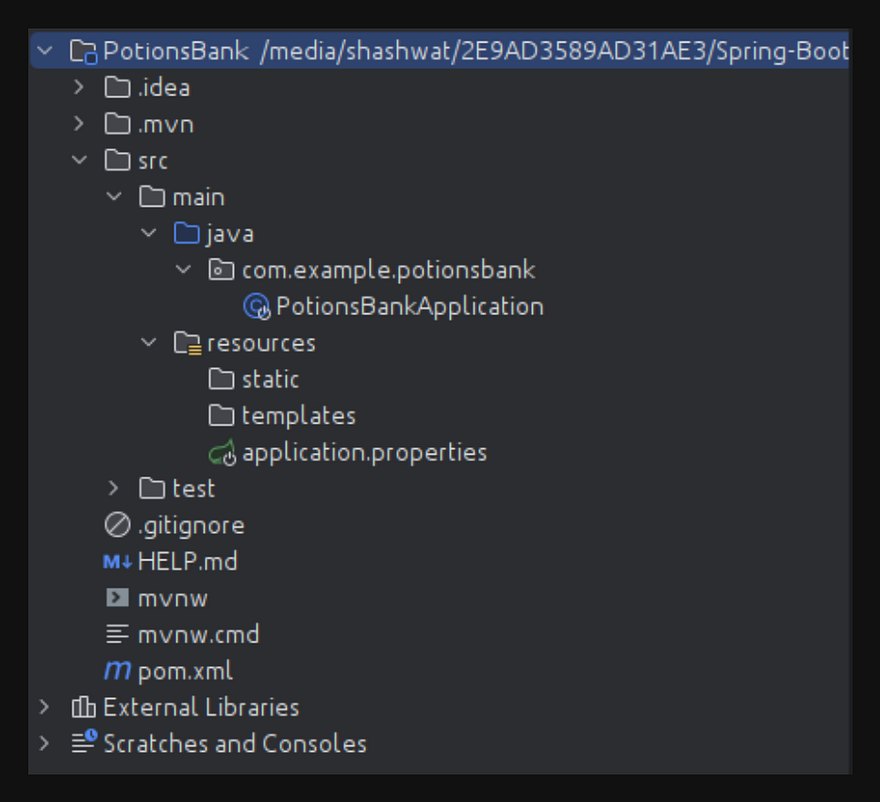
This is what the initial project folder looks like-
After this, your pom.xml file should look something like this-
Your pom.xml file might be a bit different at the beginning but it should have every dependency mentioned here, or if any dependency mentioned inside of the <dependency></dependency> tag is not present, you may add it manually by copying it from the code above and placing it smartly in your file, and reloading the project, so the dependencies can be refreshed.
Configuring MongoDB database:
Sign up at MongoDB, and then create a free cluster.

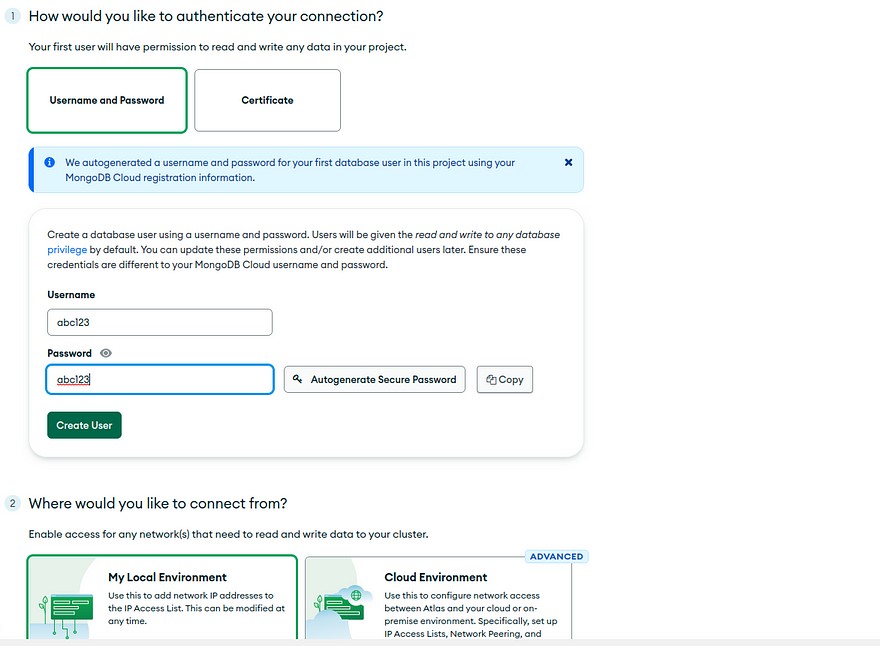
After the cluster is created, enter the username and password to create a user, click on Create User and then click Finish and Close as shown.
You’re now ready to create a database and collection inside your database in the MongoDB Cluster.
Next, click on Browse Collections > Add My Own Data and name your database and collection as PotionBank and Potions respectively.
Now, go back to the overview and click on connect.

Choose Drivers to connect and only copy the string given in point 3 which looks like — mongodb+srv://<username>:<password>@cluster.flihlkb.mongodb.net/?retryWrites=true&w=majority
Now, in the Spring Boot project, open the application.properties file present inside src.main.resources folder and add the line mentioned in the code block below:
Replace the CONNECTION_STRING with the string you copied from MongoDB and make sure to replace the username and password placeholders with the credentials of the MongoDB user created earlier.
Your database is all set and integrated now.
Developing the API:
The Potions Bank is all about storing magical potions. So let’s define the fields that describe any potion. It’s known as defining the model and in this case, defining the Potions model.
Inside the
com.example.potionsbankpackage, create a model folder, and create a file namedPotion.javainside it, which looks like this:%[gist.github.com/Shashwat79802/f0d5ca83b5b5e..
In line 12 of the
Potion.javafile, replace the value Collection_Name -> Potions assigned tocollectionwhich is the name of the collection we created in the MongoDB database. Here, we define and associate id, name, description, bottle, and quantity fields with our Potion model with a bunch of constraints such as@NotBlank,@Size(max=200), etc. Also, we use getter and setter methods with each field because the users shouldn’t be allowed directly manipulate the data, so the areas are made private and are allowed to be manipulated only via the getter and setter methods.Create a folder named repository inside of the package
com.example.potionsbankand createPotionRepository.javafile in it and paste the code present below:%[gist.github.com/Shashwat79802/1797588ad7bd9..
Here, we create an interface
PotionRepositorywhich reflects the data to and fro the MongoDB database that takes two arguments: a Potion object and a UUID id related to the object.Now, create a folder named exception in the same package in which we’ve been creating folders till now. And we create a
ResourceNotFoundException.javafile inside it. The contents of this file are:%[gist.github.com/Shashwat79802/22944671b0bb8..
ResourceNotFoundExceptionis what our server returns whenever the requested data is not found in the database.Create
PotionService.javafile inside a new folder named service in the same package and paste the code provided below:%[gist.github.com/Shashwat79802/53832883535e4..
This interface defines a convention to manipulate the Potions model by performing CRUD operations over it. The implementation of this interface is provided in the next step.
Inside the service folder, create the
PotionServiceImpl.javafile. This class implements thePotionServiceinterface i.e. the methods provided in it.%[gist.github.com/Shashwat79802/75c45eda568c3..
Through this, we’re able to perform the following operations over our model: Create data, update existing data, get all the data, get specific data by ID, and delete data.
The last step is to create and define the endpoints of the API which we do by defining a
RestController. For this, create a file namedPotionController.javainside the controller directory which has to be created in thecom.example.potionsbankpackage. The controller looks like this-%[gist.github.com/Shashwat79802/97f800c57508f..
Here, we defined certain annotations like
@GetMapping(“/potions”),@DeleteMapping(“/potions/{id}”),@PutMapping(“/potions/{id}”), etc. which act as API endpoints, and the respective operations will be performed when these endpoints are hit. Respective methods are associated with these annotations which in turn call the methods defined inside ofPotionServiceImpl.javato do CRUD operations over the data.
And this completes the Potions Bank API. To run this application, open the PotionsBankAppliation.java file which contains the main() method that acts as the entry point for the application. Executing it will start running the application on localhost:8080 which is the default port that the Spring Boot uses to run its applications.
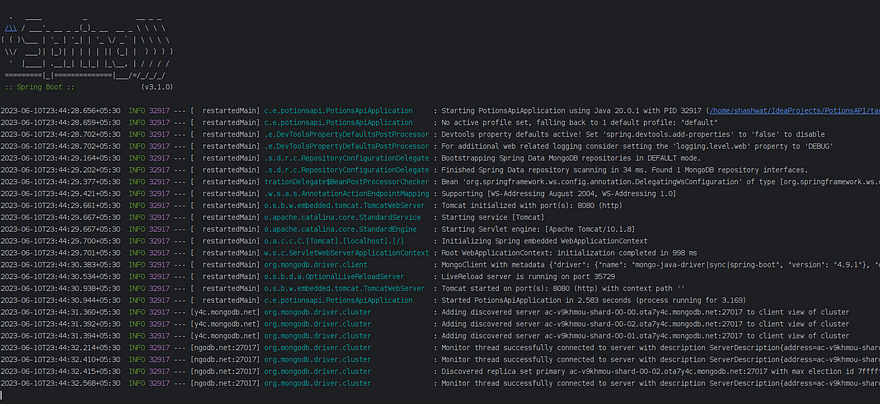
This shows that the application is up and running without any errors, if you face any abnormality or any exit code, then there may be some error and you should consider revisiting the error showing parts of it.
Since the application is running fine, we must test it by hitting the defined endpoints and try manipulating the data. For this, I’m using the Postman desktop client to check to validate whether API is working fine or not.
Making and validating the API calls:
According to the endpoints defined in
PotionController.java, making the API call as aGETrequest to the root URL i.e.http://localhost:8080must return a Hello World response with a status code of 200 OK.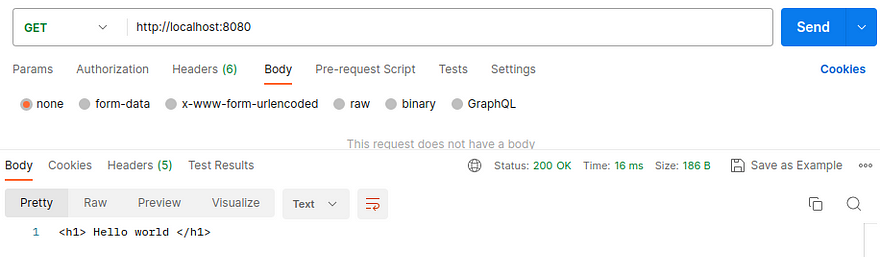
So, the root endpoint works just fine!!
Making a
POSTrequest to the /potions endpoint with the data of any magical potion as a JSON object should add the data to the database and return the data with its assigned UUID included.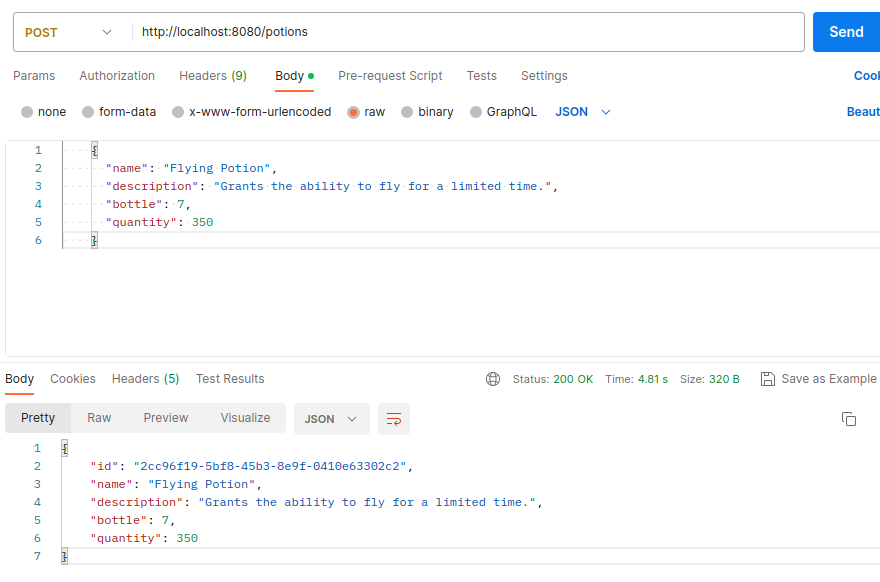
Here, a POST request was made with the data of Flying Potion which was successfully added to the database, and as a response, the same object was returned with a new id field added to it.
Now, to verify whether the data in the previous step is surely added to the database or not, we make a
GETrequest to the/potions/{id}endpoint, replacing the placeholder id with the UUID received as the response above.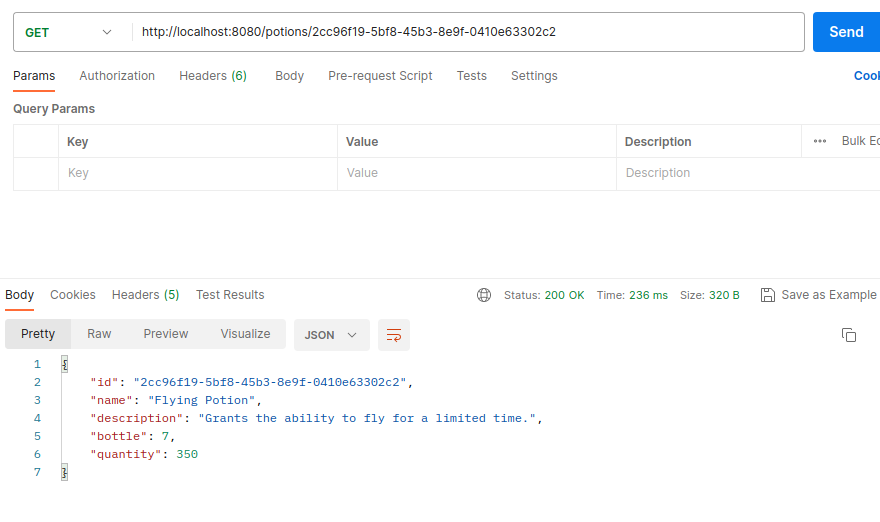
Therefore, making the
GETrequest with the appropriate id in place, the same Potion object was received as a response. If in case, the object data wasn’t added to the database or a wrong UUID was provided with the request, the following response will be received: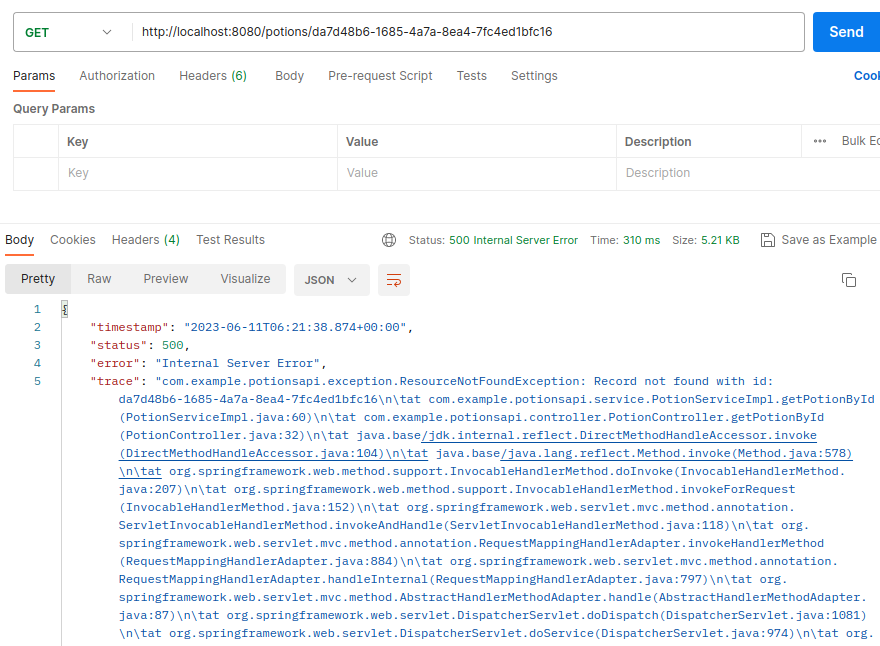
And this response says that
ResourceNotFoundExceptionwas encountered which means the data is either not present or a wrong UUID is provided.Now to view all the Potions present in our Potions Bank, make a
GETrequest to the/potionsendpoint: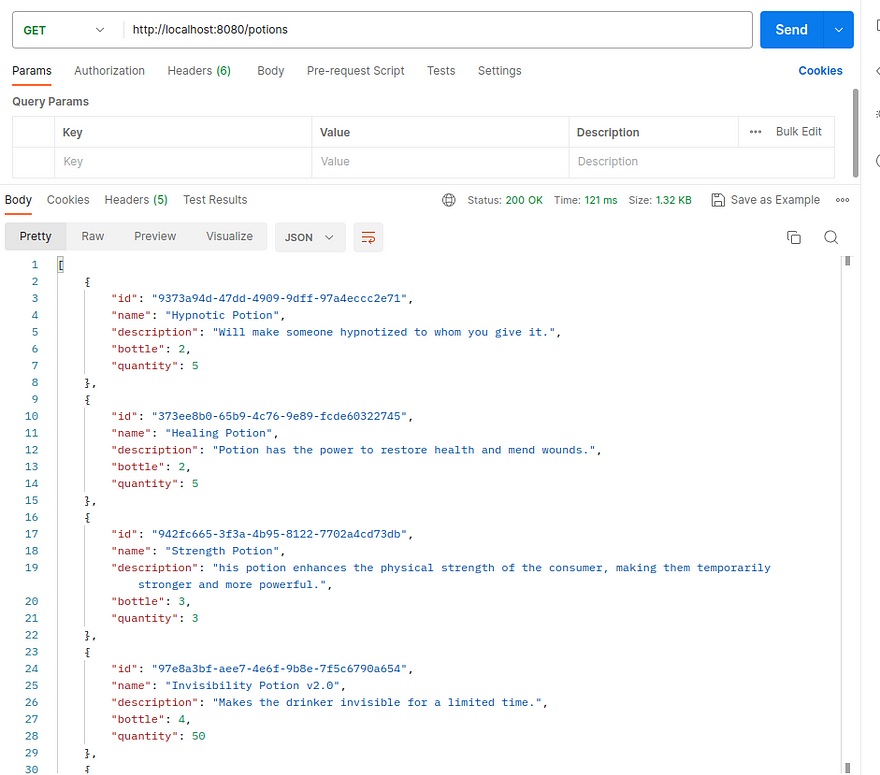
This gives the details of all the available potions in the bank.
Let’s now try to update the data of the Flying Potion we just added. And to do so, we make a
PUTrequest to the/potions/{id}endpoint, replacing the placeholder id with the appropriate UUID of Flying Potion. And what we update is, we’ve got a new update for the Flying Potion as Flying Potion v2.0 with 4 bottles and a total quantity of 200ml.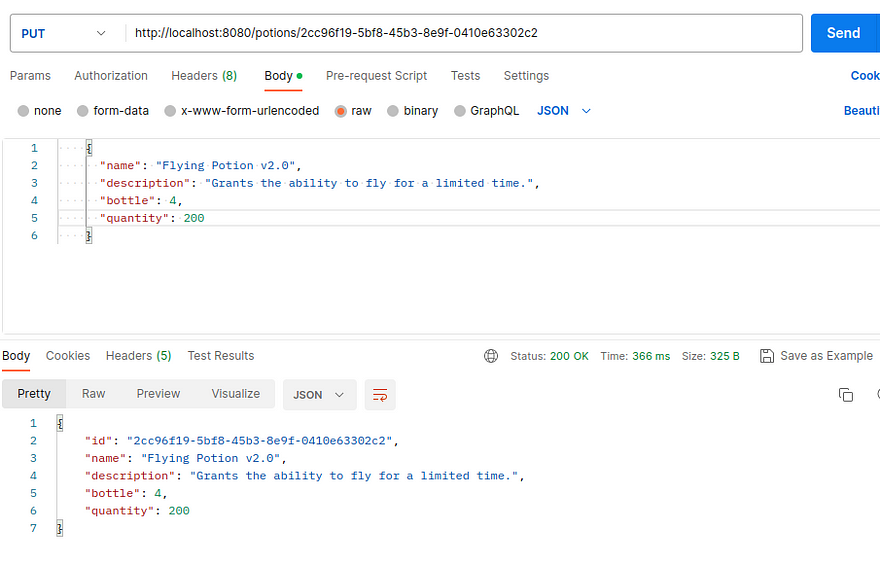
So, on making the request, we get the updated response of the object with its UUID having updated values in place. You may verify it by making a
GETrequest to the/potions/{id}endpoint.Finally, to delete the data, make a
DELETErequest to/potions/{id}endpoint. Let’s try to delete the Flying Potion v2.0 and if the operation is successful, we get “OK” as the response.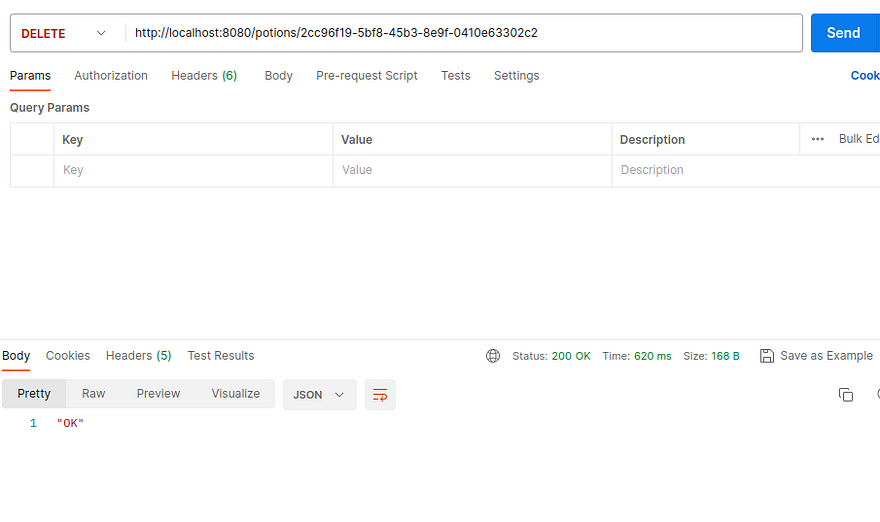
If this operation fails due to any reason,
ResourceNotFoundExceptionwill be encountered again.
And in this way, we finally validate the request and response to the Potions Bank REST API.
Conclusion:
We covered all the steps required to create a RESTful API and integrate it with the MongoDB database. You may add some business logic to try and manipulate this API at your convenience.
Hope this tutorial helps you to understand the fundamentals and steps of building the REST API.
In case of any doubts or issues, please feel free to reach out and connect with me on my socials- Twitter, LinkedIn, or Email 🌻